Debian Linux Virtual Machine (virt-manager+QEMU+KVM) - Enable Drag & Drop Files, File Sharing, Shared Clipboard, Copy & Paste
I’ve been using Debian recently. For virtual machine installation, you can refer to my previous post - it’s quite similar.
After successfully installing Windows in the virtual machine, I wanted to enable drag & drop files, shared clipboard, and copy & paste. However, drag & drop currently only works one-way from host to VM, and only to the VM desktop. As a workaround, I added a shared file directory to transfer files from the VM to the host. After using it for a while, I found this shared file directory quite convenient, and I no longer use drag & drop - I just work directly in the shared file directory.
VirtIO
Mainly used for shared clipboard, copy & paste, and drag & drop files
For VirtIO installation, refer to the Proxmox VE documentation on Windows VirtIO Drivers.
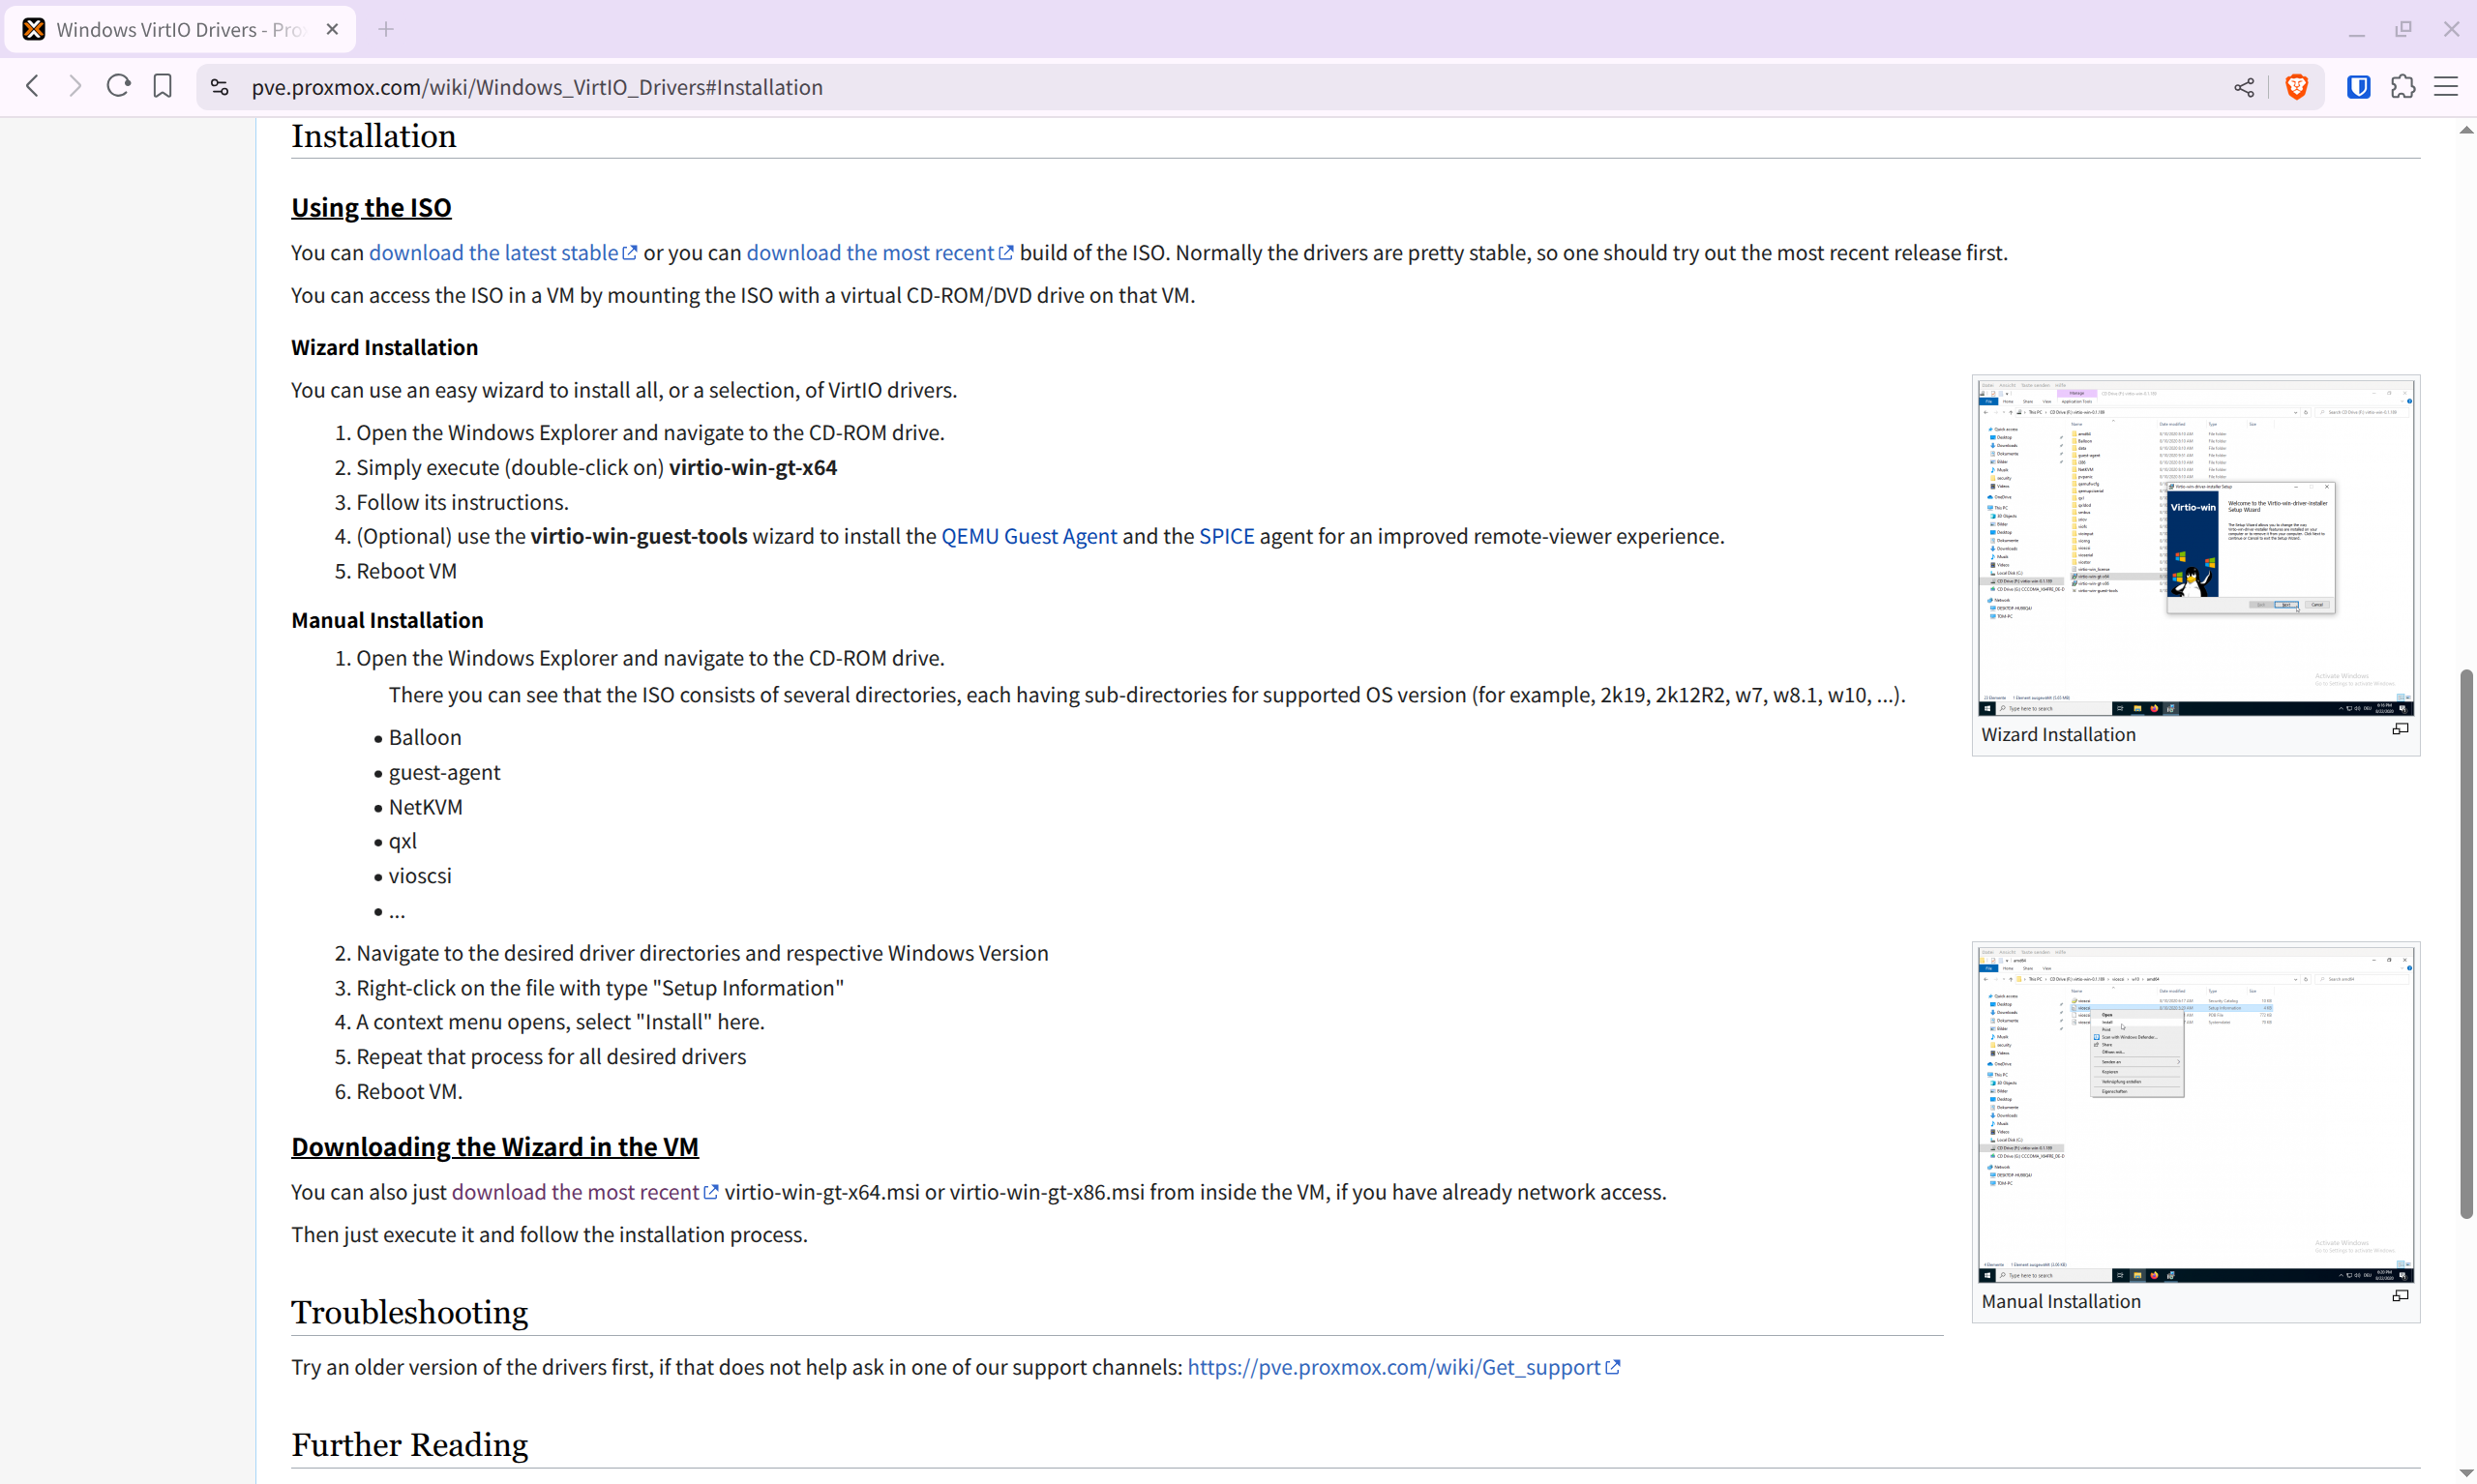
If the VM has network access, you can directly download virtio-win-gt-x64.msi or virtio-win-gt-x86.msi depending on your system, then install virtio-win-guest-tools.exe. If the VM has no network, download virtio-win.iso and mount it as a CD drive in the VM.
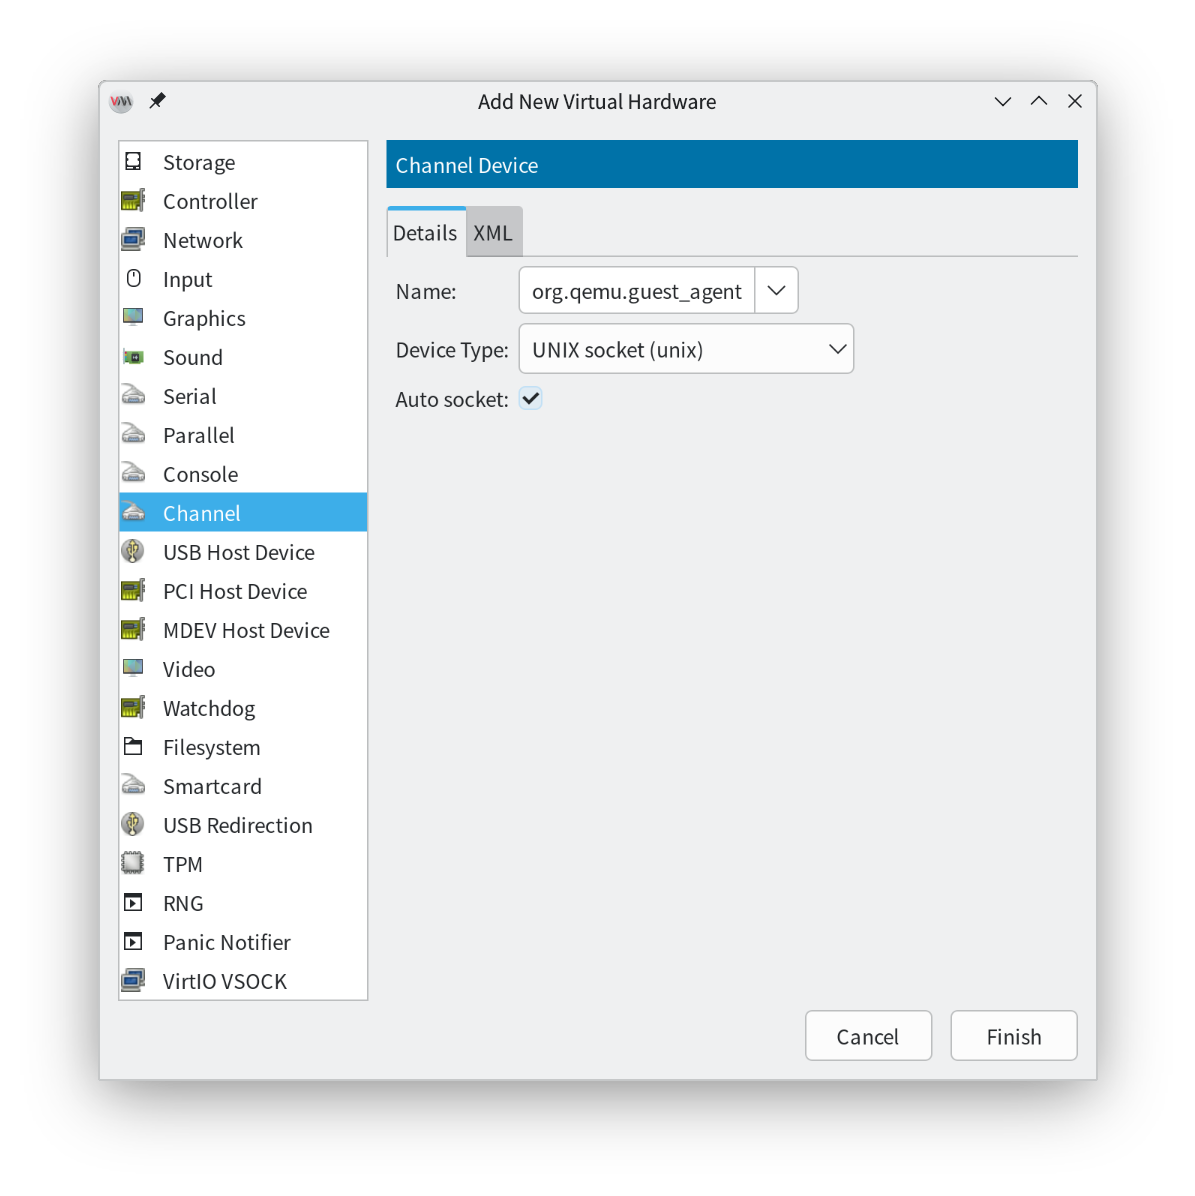
After installation, configure in virt-manager (Linux host side) to enable shared clipboard, copy & paste, and drag & drop files.
Click Add Hardware in the bottom left
 Select Channel, and in the dropdown on the right side of Name, select org.qemu.guest_agent.0
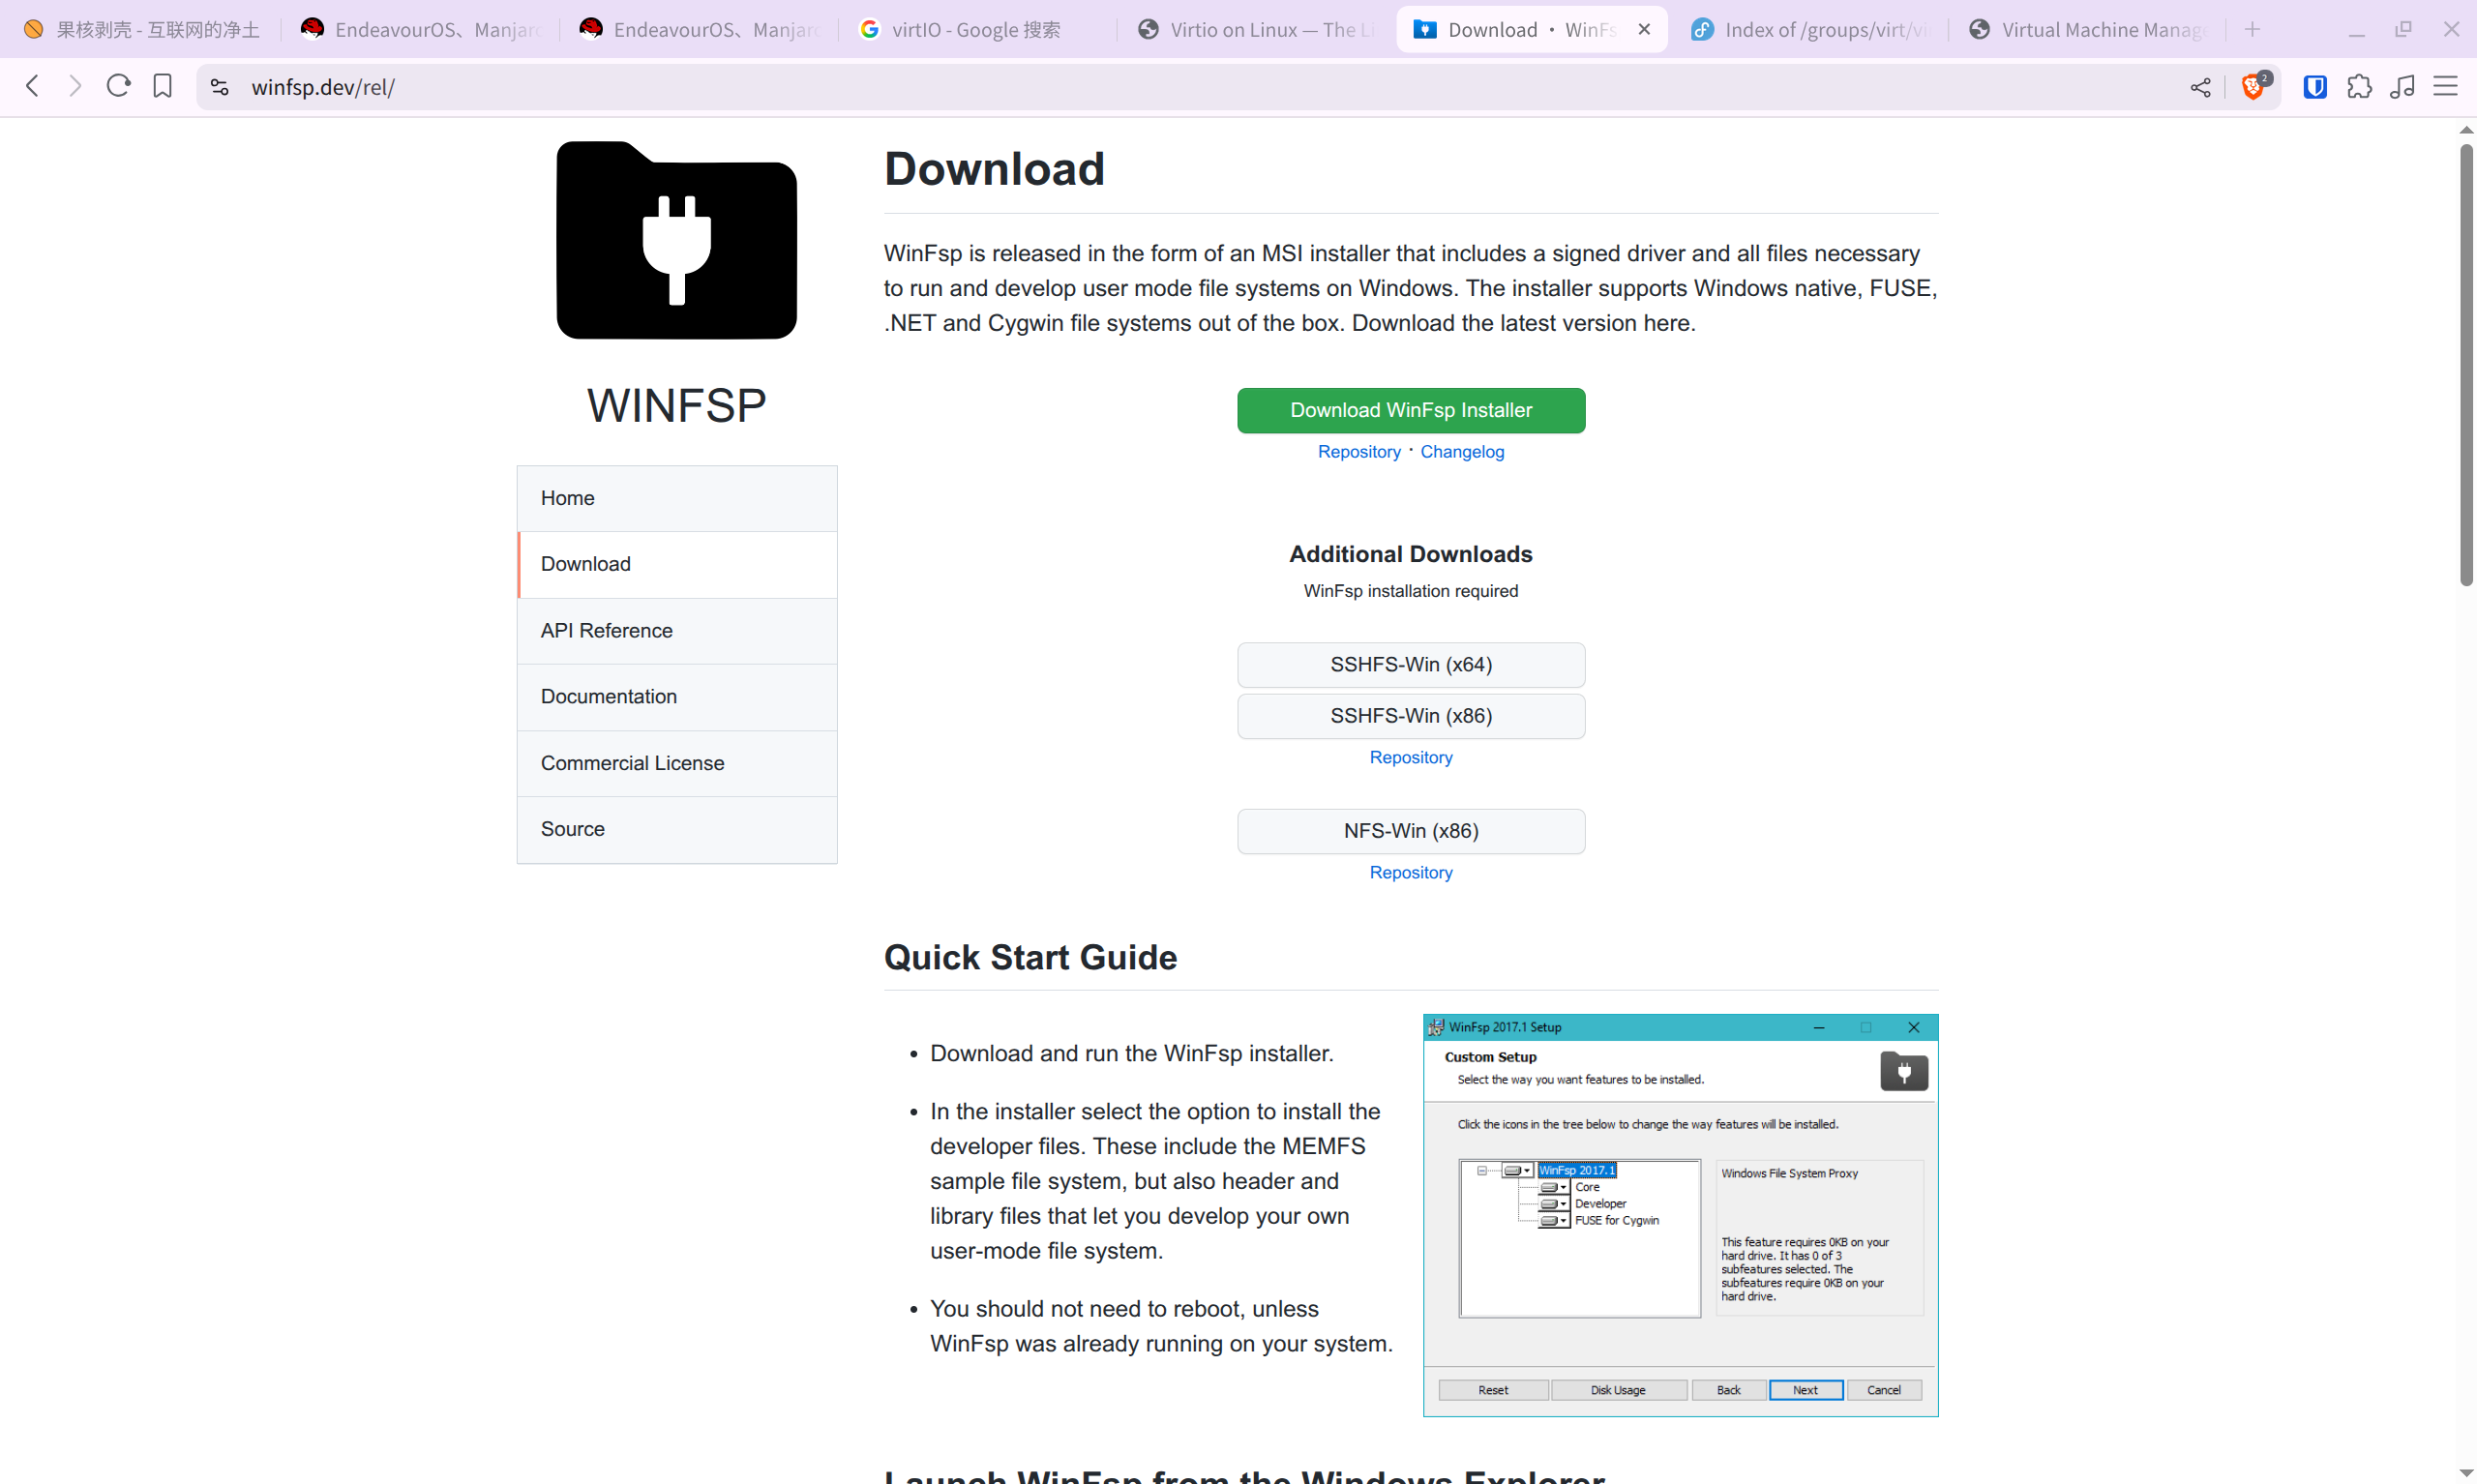
WinFsp
Mainly used for shared file directory
The official documentation has installation instructions. Just download the WinFsp installer and install with default settings.
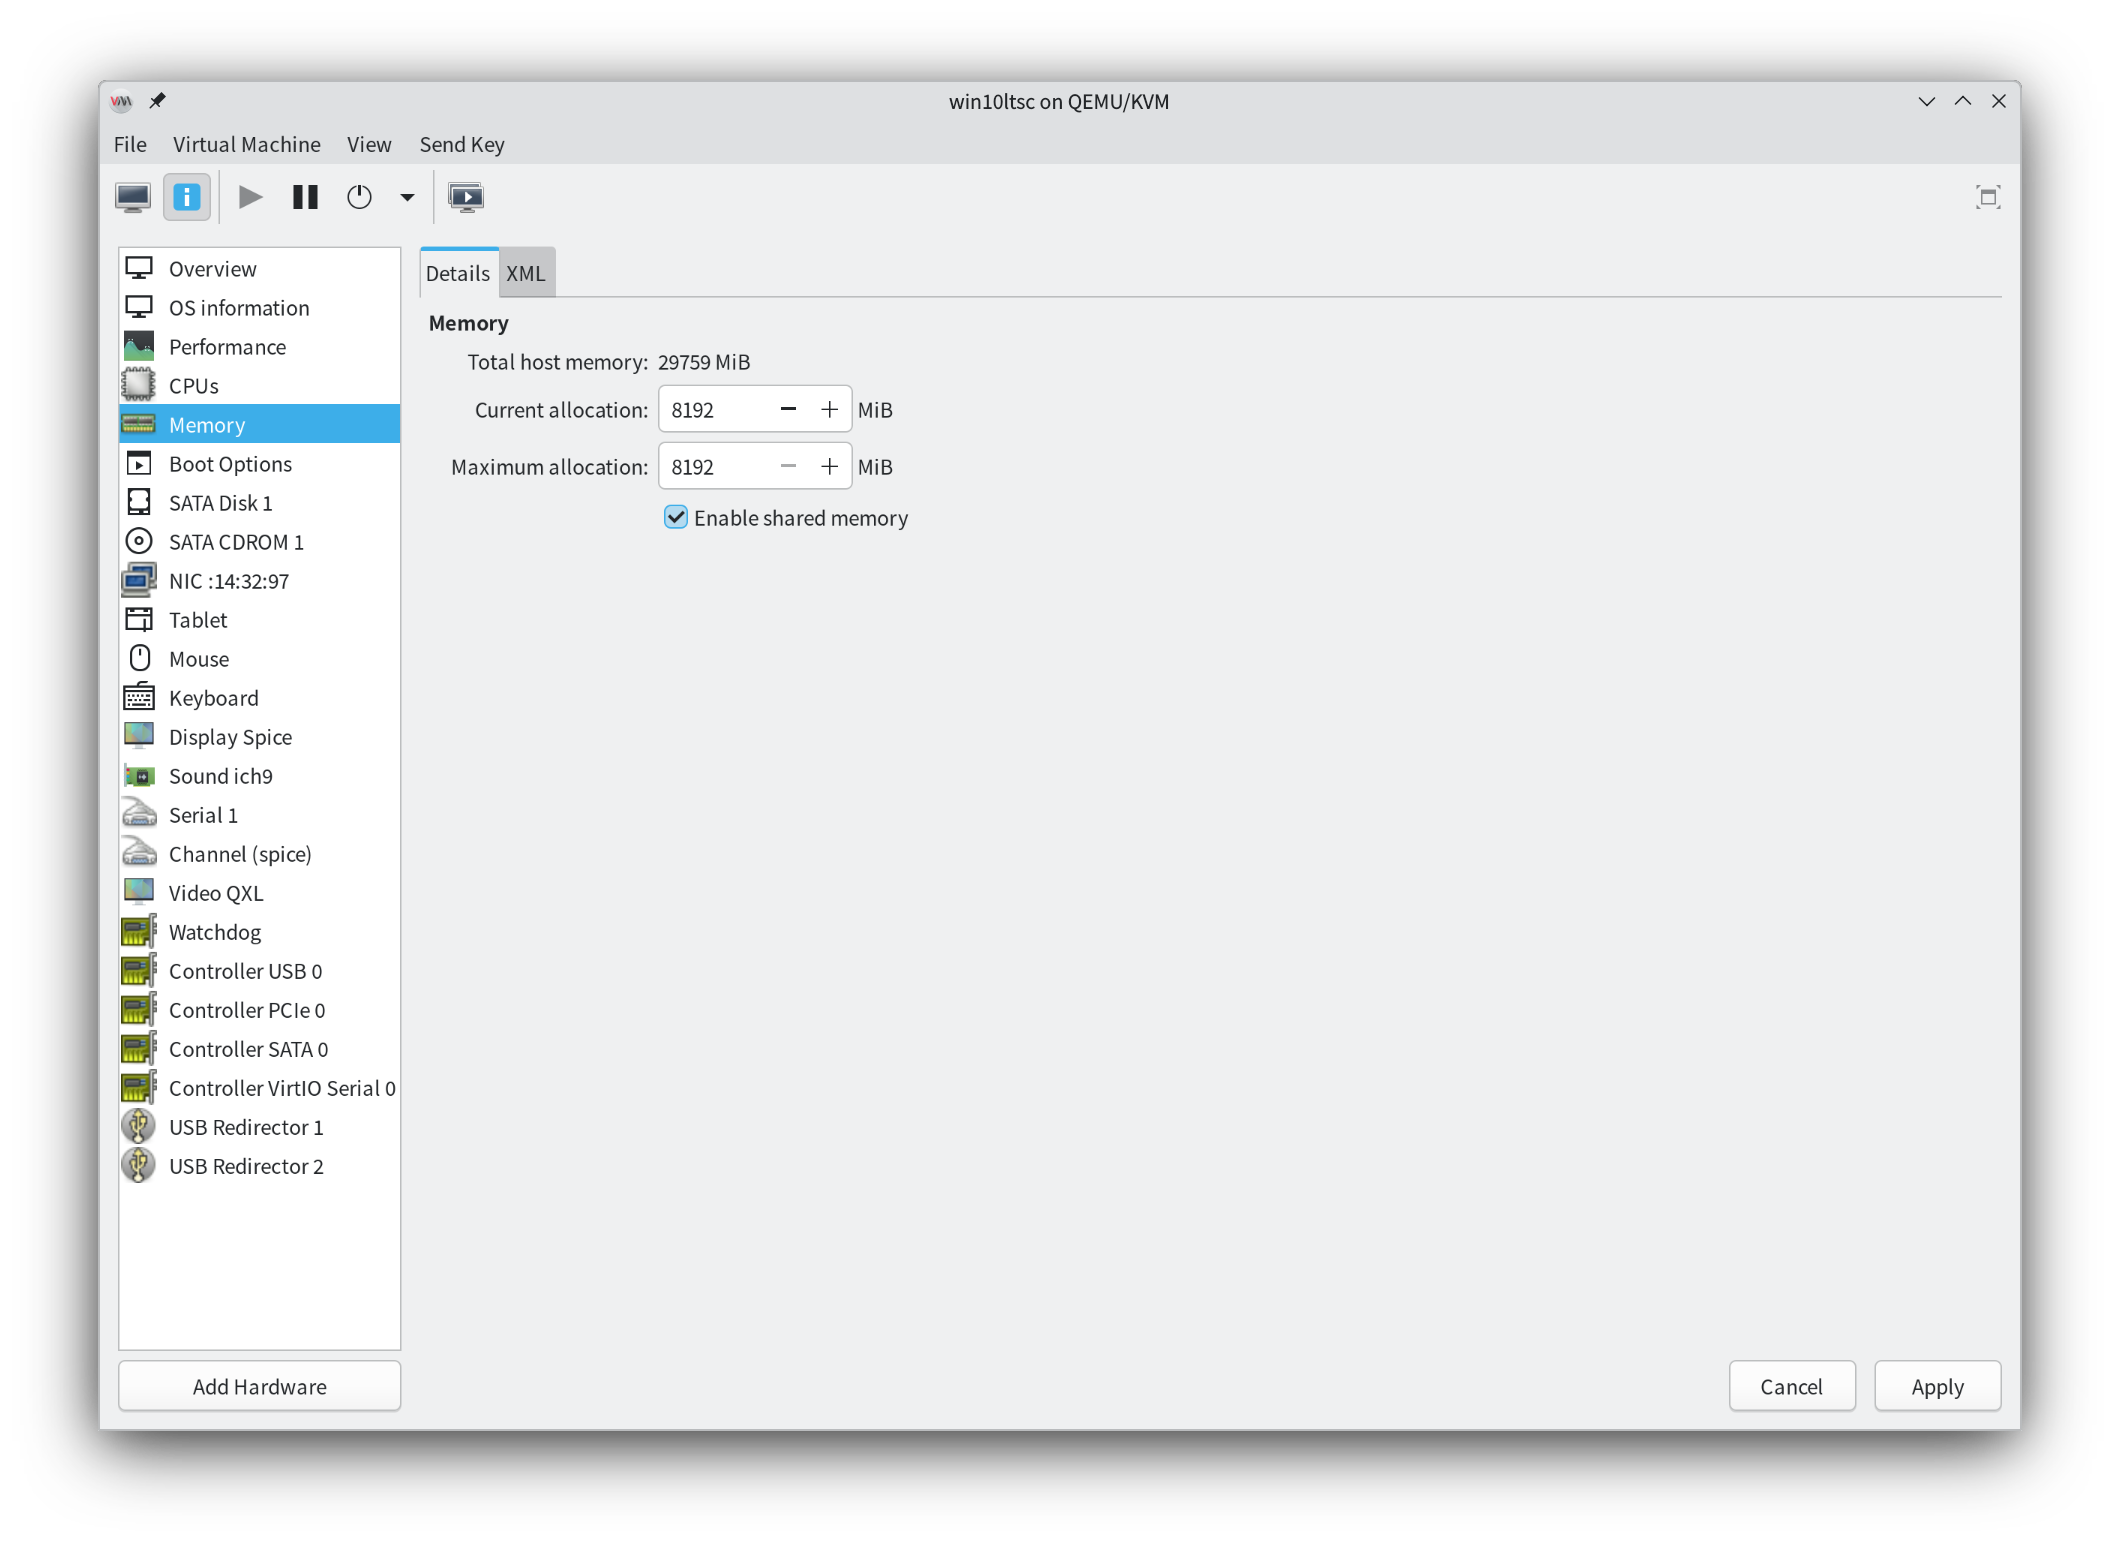
After installation, configure in virt-manager (Linux host side)
Click Memory and enable Shared Memory.
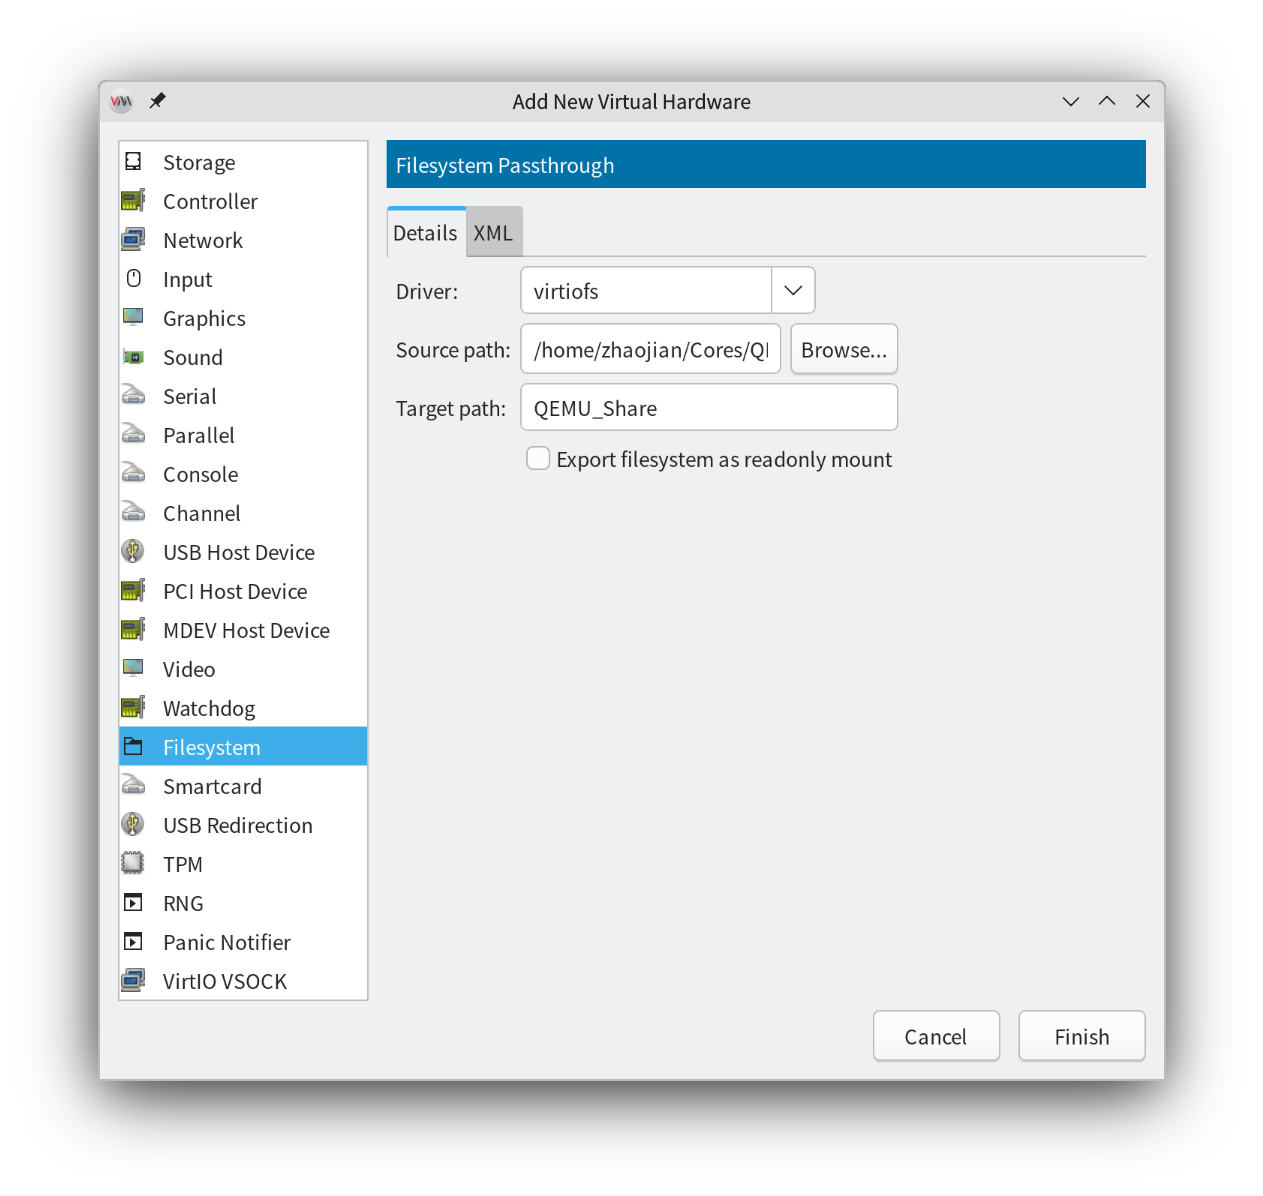
 Then, add hardware again, this time select Filesystem. Choose a directory on the host for file sharing, and set a display name for this directory in the VM.
 Next, configure on the Windows VM side. Press Win+R to open the Run dialog and type services.msc, or press Win+S to open search and type “Services” to open the Services window.
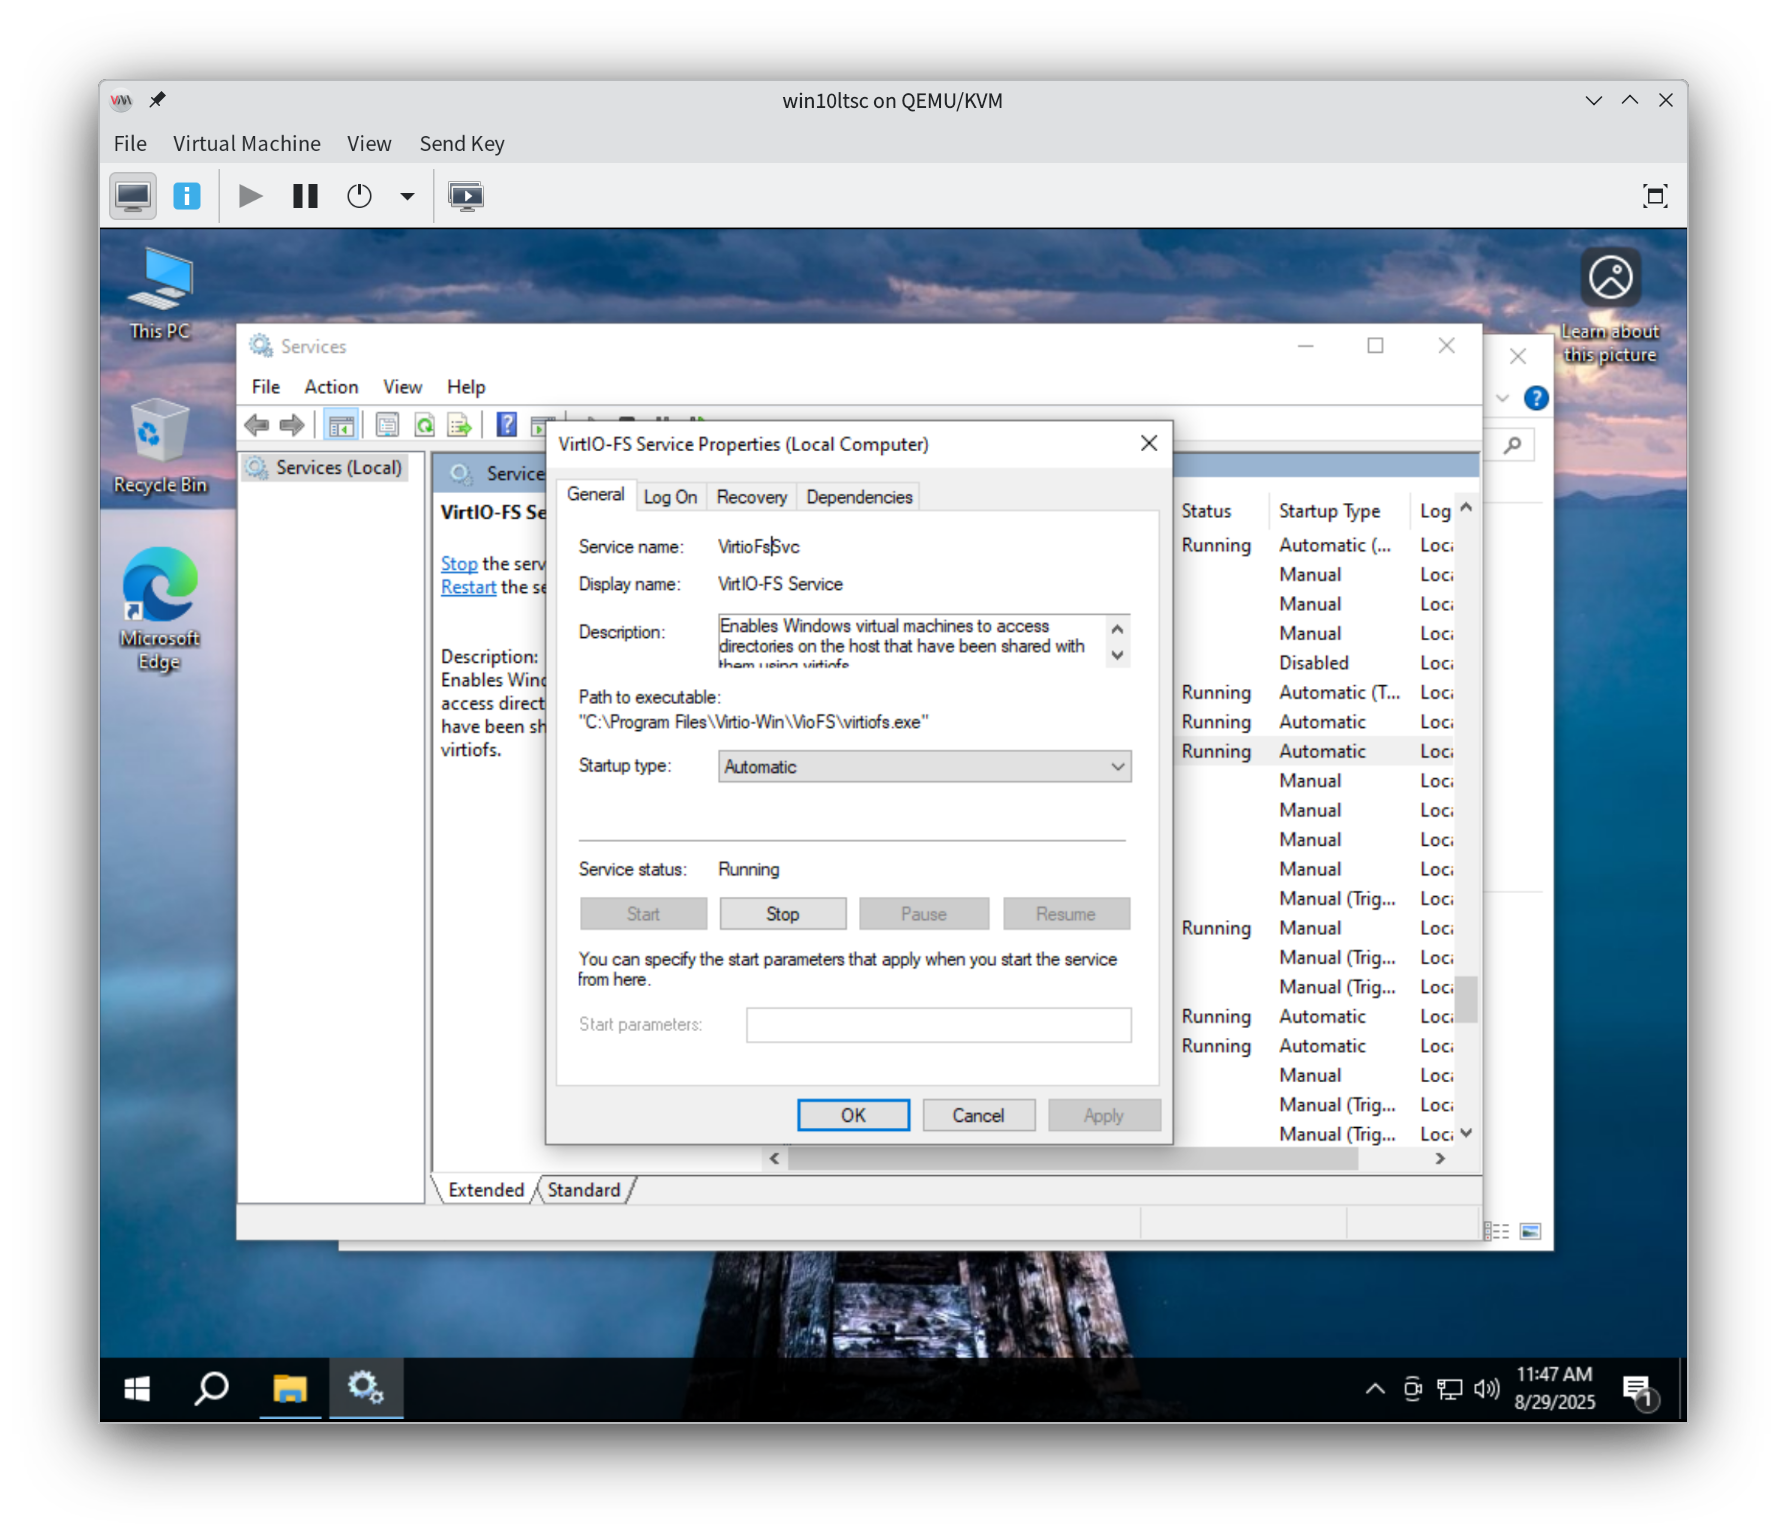
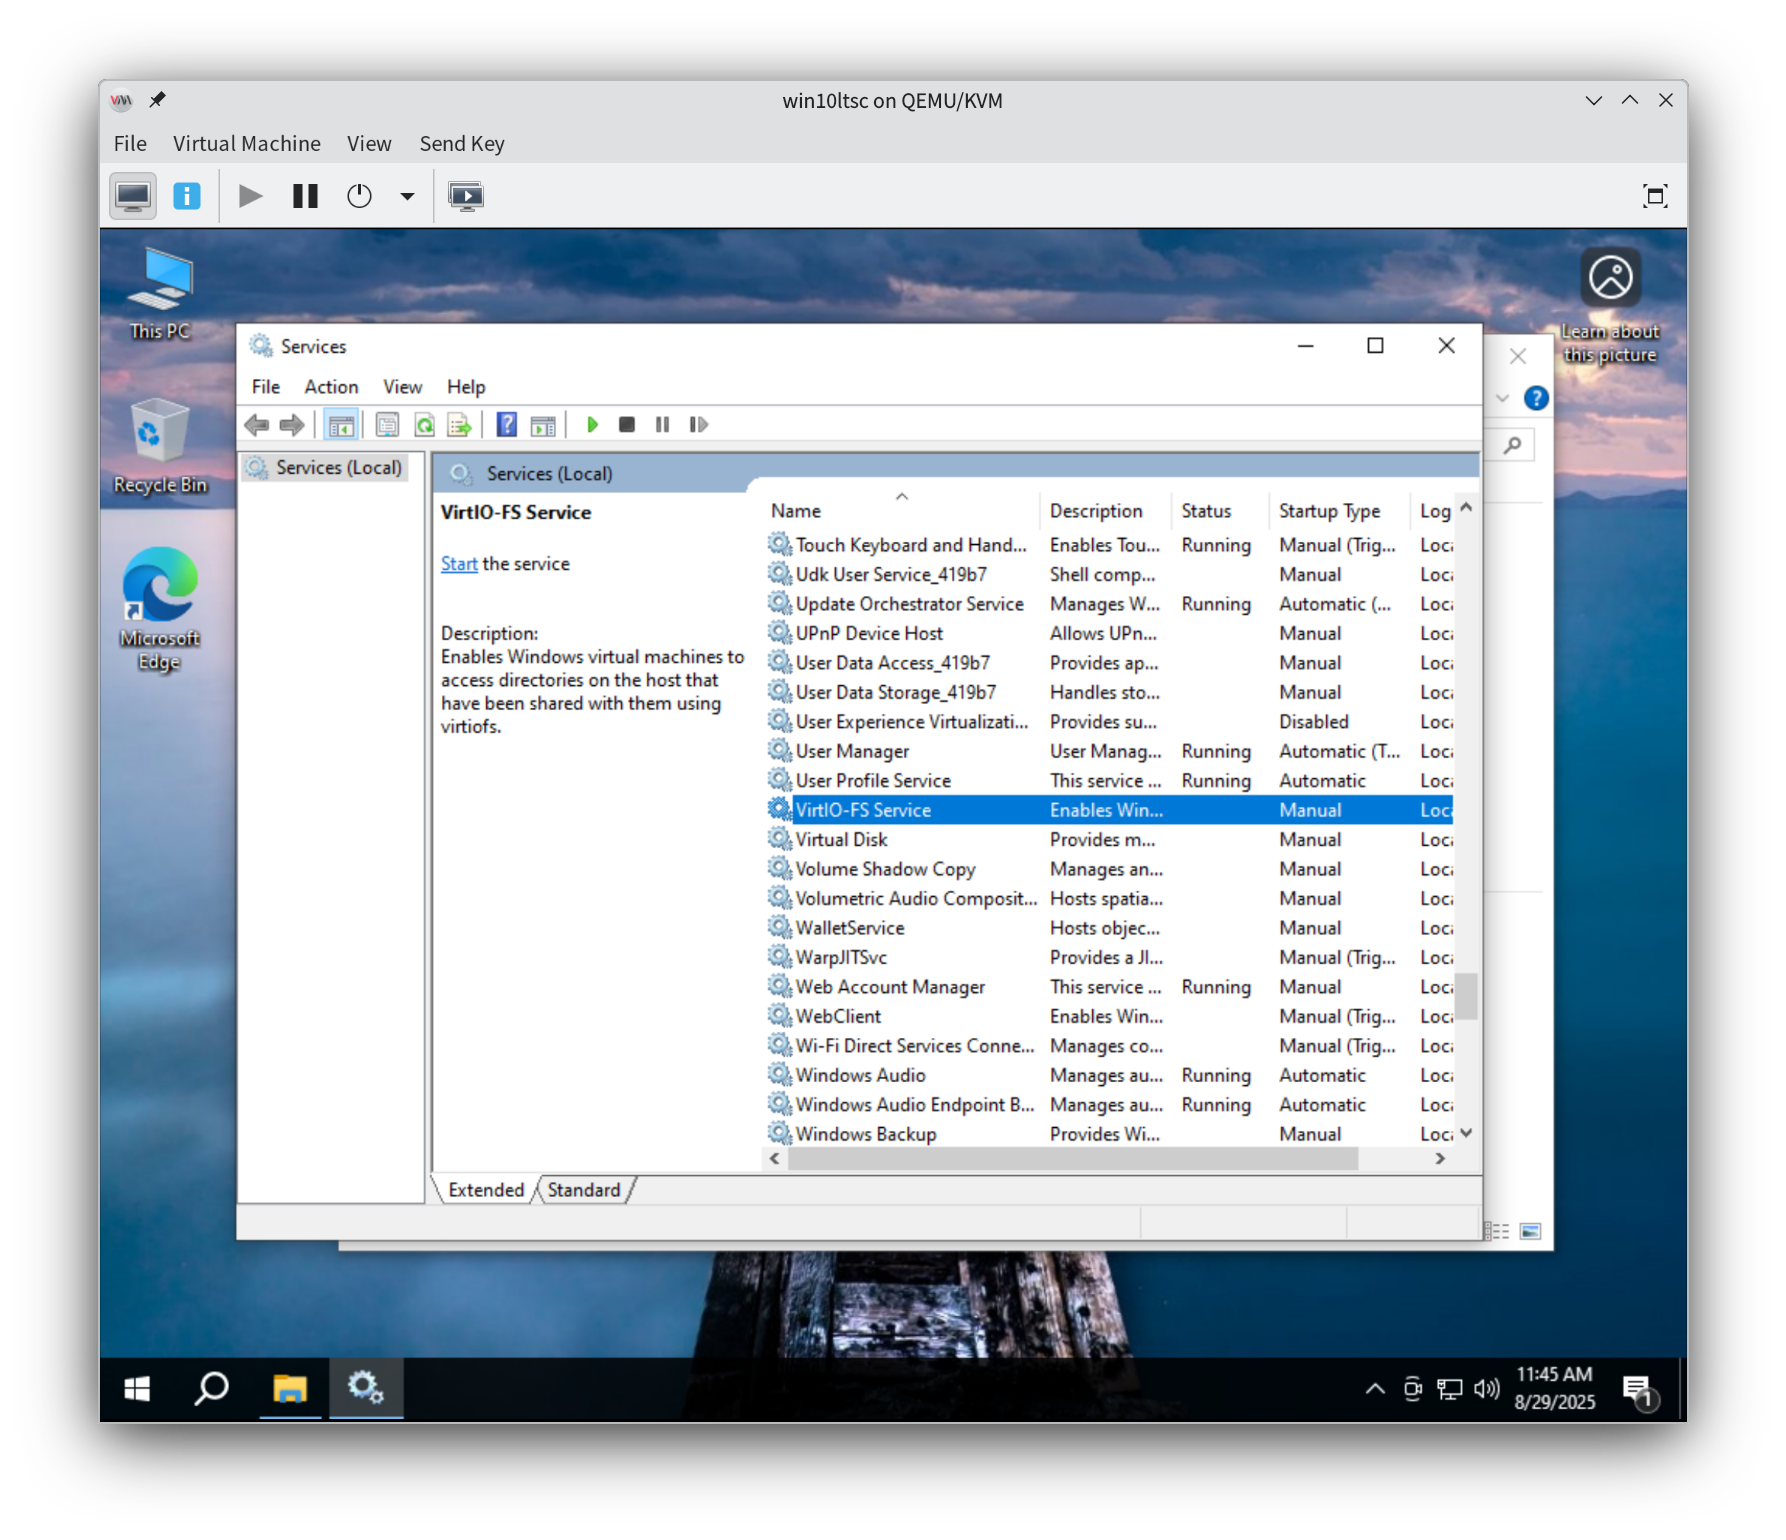 Find “VirtIO-FS Service”, double-click it, set it to Auto start, and start the service.
 After the service starts, you can see the shared directory in “My Computer”.

For all software installations above, just use default settings - no extra configuration needed, just click Next to complete.